Pendants, Geodes, Resin Coasters, Resin Trays, Resin Pour Tutorials On My You Tube Channel
Charcuterie Board Resin Application
Application:
-Mix Resin and Hardener for 3 minutes
-Pour over board and spread with popsicle stick
-Use your gloves hand to carefully bring resin the edges.
-You want to concentrate the resin on the top of the board, the blot resin on the sides with your fingers. The sides should not have thick resin, as this will result in resin on top pouring over the sides.
There will naturally be some drips. Use the popsicle stick or a gloved finger to swipe the drips.
Pour one bag of wax in a microwave safe bowl or measuring cup.
microwave on High until wax is melted (2-3 minutes)
Pour oil into melted wax and stir
Pour wax into jar
Place wick in the center, and secure in place with a stick or two knives until wax solidifies
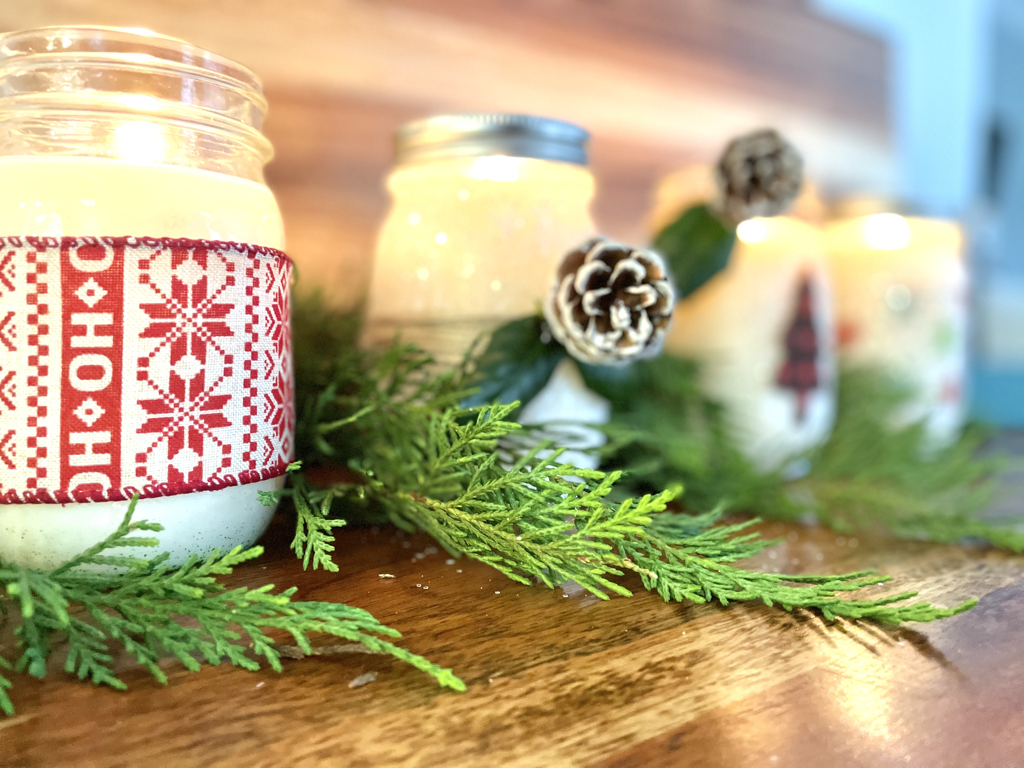
decorate jars with materials
salt/snow (apply thin coat of glue to entire jar then coat with glitter mixture)
use provided glue to attach ribbons, tie twine and attach cones with glue
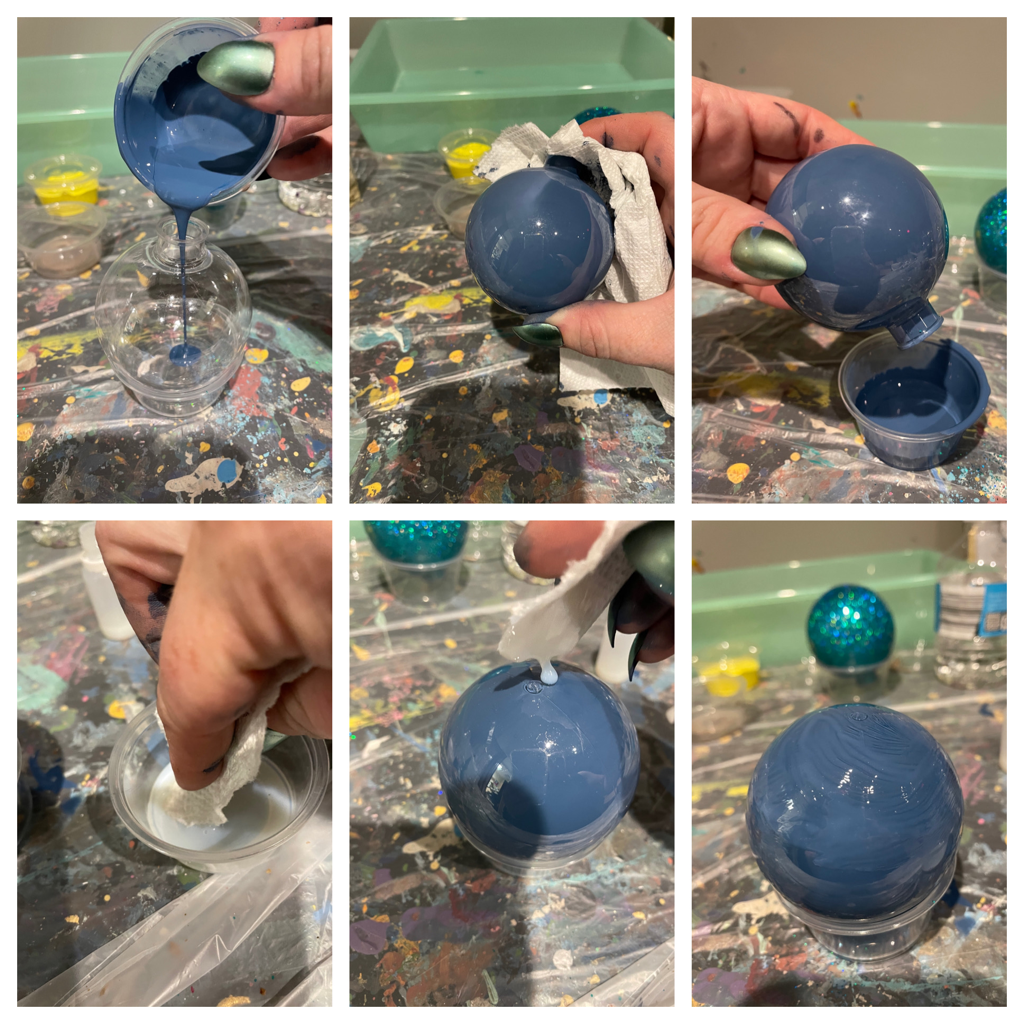
Paint Pour Ornament
Add a small amount of water to the paint provided and mix. You do not want it too thin, but thin enough to help it pour and move inside the ornament
pour paint in layers inside a plastic cup
then slowly pour into ornament. Pour into a few different areas of the ornament.
rotate until the whole ornament is covered
then set upside down inside a cup to drain any excess paint
Cinnamon Ornaments
Glitter Ornament
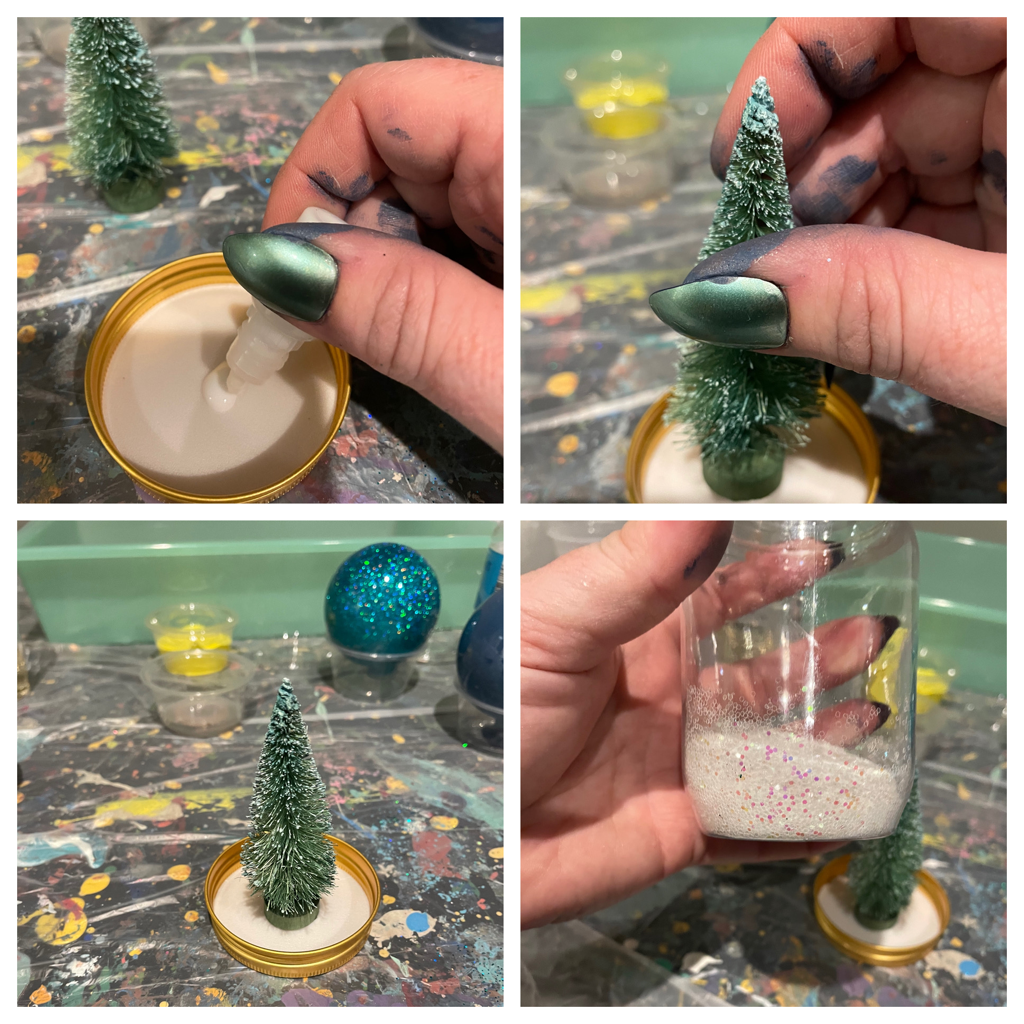
Snow Globe
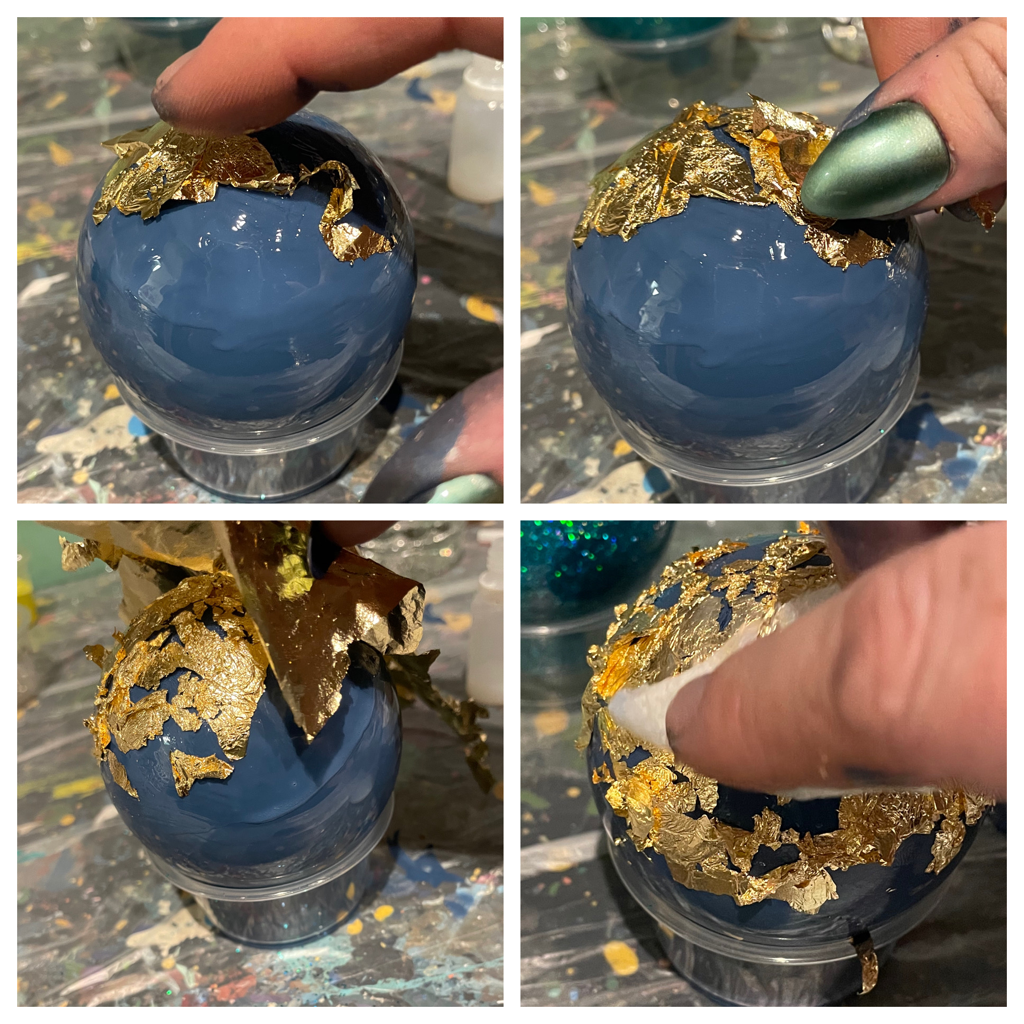
Gold Leaf Ornament
Add a little water to the pain provided and mix. This allows the paint to cover the inside of the ornament
pour paint inside ornament
cover with finger and paper towel, then shake
turn upside down and place in cup to drain and dry
apply the clear poly used for glitter ornament to the base of the ornament with a paper towel
apply gold leaf
alliw to dry then add another layer of poly
pour paint inside ornament
cover with finger and paper towel, then shake
turn upside down and place in cup to drain and dry
apply the clear poly used for glitter ornament to the base of the ornament with a paper towel
apply gold leaf
alliw to dry then add another layer of poly
Resin Clocks
Remove Clay Form from edges. You can keep it attached also, and paint it. Completely up to you
Paint the edges with gold paint
Clean brush, and apply glue to surface where you want to adhere glass
Set glass on glue, pour on glitter if you would like, then allow to dry, or blow dry
Paint the edges with gold paint
Clean brush, and apply glue to surface where you want to adhere glass
Set glass on glue, pour on glitter if you would like, then allow to dry, or blow dry
AGATE RESIN ON CANVAS
*Make sure your work surface is set up and you have read through the steps before mixing the resin. The longer you wait after mixing the resin with the hardener, the less fluid the resin will be. *
1. Place plastic on a flat surface (a garbage bag works great)
2. Push tacks into the wooden stretchers on the back to keep canvas lifted off the surface. You can also use cups for this if you do not have thumbtacks.
3. Empty Mica Powders into the dixie cups
4. Have a blow dryer plugged in and ready
5. Mix the Hardener with the Resin, be sure to scrape the edges of the cups to ensure all liquid is emptied into the mixing cup
6. Mix for 3 minutes, scraping the edges and bottom of the cup as you stir, do not whip the resin. Once all striations are gone, your resin is ready
7. Pour equal amounts of resin into your mica powder cups
8. Mix the mica and resin in their individual cups until the mica is dispersed (do not whip or over mix)
9. Pinch the cup to make a spout, pour each color in lines across the canvas, each new color should follow the existing pattern poured to create somewhat of a pattern (Do not pour white, if you would like to use white, make sure you leave some for the final step of pouring thin white lines)
10. Once all your colors have been poured, use your hair drier on high to heat and push the resin across the canvas. You can tilt your canvas to encourage more movement. If you have places where resin has not covered, you can use the stick or your finger to encourage movement of the resin (Keep in mind, resin is self leveling, so if you disturb it when wet, it will self level)
11. Once you have finished moving your resin, take the crushed glass at apply it directly to the wet resin. I usually position the glass along the edge of colors to make it pop
12. Using your finger, smooth the resin over the edges of the canvas. Let the canvas set for about 20 minutes then apply the glitter to the sides of the canvas. This is optional. You can also apply the glitter to the top of the canvas as well.
Please text me with any questions: 8044241342 -Laura
ocean resin on canvas
Place pushpins in the back of canvas, to raise it off surface
Place a plastic garbage bag on a flat work surface that is in a safe location away from high traffic
Paint the bottom of the canvas with tan paint, dry with hair dryer
Empty Mica powder into bottom of the Dixie cups (5 cups total, 4 colored, 1 clear)
Pour Resin and Hardener into clean cup
Scrape the inside to remove all liquid
Stir slowly for 3 minutes or until all striations are gone
Pour mixed resin into 5 cups evenly (white will receive less)
Slowly Mix Mica into resin. Do not whip, this can speed up the curing process. 10-15 stirs should do, revisit after a minute to disperse any powder that rises to the surface.
Pour 3 blue colors across canvas, starting with Navy at top, Lighter blue, then lightest. Using stick, spread evenly across canvas, combining colors where they meet to transition from dark to light
Use hair dryer to blow resin and disperse
Pour 3 thin band of clear resin across the canvas, 2 in the blue areas, 1 at the end of the blue, where the tan hits the light blue.
Pour thin band of white resin on top of the clear resin bands
Using dryer, blow the white resin across the top of the blue resin
Apply clear resin over the sand area, if using sea shells, apply them on top of the clear resin
If you want to go back and apply more resin you can do so at this time. Keep in mind, less is more with the white portion of this project!
Stepping Stones
(If you prefer to make a detailed design, we recommend tracing your mold onto a piece of paper, to plan out your glass placement, then transfer glass to the cement. Be sure to plan out your pattern before mixing the cement. Otherwise, you can just place your pieces in a freestyle format.
1. Cover work surface with newspaper or a plastic garbage bag
2. Apply a thin layer of cooking spray or any cooking oil to the inner edges and bottom of the mold
3. Depending on the size of your stone, you may need to transfer your cement contents into the provided mixing pouch. Some kits, you will use the original bag for mixing.
4. Slowly add 6-8 oz of water directly inside the "mess free" mixing pouch. Press the seem all the way across the pouch leaving a small gap at the end. Press the body of the pouch to force any trapped air out, finish pressing the seam to seal. Squeeze the pouch to mix the cement. If cement appears dry, open pouch and add more water. 1 tablespoon at a time, until the mixture becomes smooth and pourable, like pancake batter.
5. Squeeze the cement slowly and evenly into the mold. Shake and tap the mold to assist in settling of the cement and removing air bubbles.
6. Place glass on top of the cement in any design you would like. If you prefer to make a more detailed design, we recommend tracing your mold onto a piece of paper, to plan out your glass placement, then transfer to the cement.
7. Allow cement to set for 24 hours before removing from the mold. 48 hours before setting outside.
KIds craft kit
Coffee Cup
Paint your glass with provided paint. Paint is permanent after air drying for 21 days or can be baked to expedite permanence.
Bake-to-Cure Method
Project can be Hand washed, or cleaned in the top rack of a standard, non-commercial dishwasher. Do not use in dishwasher if it has pot scrubbing features or top jets.
Butterfly Sun Catcher
Glue tissue paper to the back of the butterfly, the hang in a sunny location
Bird House
Paint Your House with provided paint, Use glue to attach glitter, moss, or gemstones.
Chain Painting
Watch these cool videos on making a chain pull painting. Use paint in the small squeeze bottles for this project. Practice on the multi media paper then make your final painting on the canvas. Paints are premixed with flow agent and water. If paint seems too thick, add a little water and shake.
https://www.youtube.com/watch?v=z9mf9fOC0Sk
https://www.youtube.com/watch?v=7Vzg_TbabLY
Paint your glass with provided paint. Paint is permanent after air drying for 21 days or can be baked to expedite permanence.
Bake-to-Cure Method
- Allow painted item to dry for 24 hours to be sure all layers of paint have dried.
- Place project in a cool oven, as the glass must heat gradually with the oven to avoid breakage; do not place glass in a hot oven.
- Set oven temperature to 350ºF.
- Once temperature has reached 350ºF, allow the project to bake for 30 minutes.
- After 30 minutes, turn the oven off and let glass cool down completely before removing from the oven.
- Do not use for 72 hours.
Project can be Hand washed, or cleaned in the top rack of a standard, non-commercial dishwasher. Do not use in dishwasher if it has pot scrubbing features or top jets.
Butterfly Sun Catcher
Glue tissue paper to the back of the butterfly, the hang in a sunny location
Bird House
Paint Your House with provided paint, Use glue to attach glitter, moss, or gemstones.
Chain Painting
Watch these cool videos on making a chain pull painting. Use paint in the small squeeze bottles for this project. Practice on the multi media paper then make your final painting on the canvas. Paints are premixed with flow agent and water. If paint seems too thick, add a little water and shake.
https://www.youtube.com/watch?v=z9mf9fOC0Sk
https://www.youtube.com/watch?v=7Vzg_TbabLY
Mother's day kit
LAVENDER CANDLE
-Melt wax in a pyrex or other microwave safe container, melt in microwave (2-3 minutes depending on microwave strength)
-Add Lavender Oil to the melted wax and stir
-Pour into metal tin
-Position wick in the center of the tin, resting on the bottom, use two popsicle sticks to hold wick in place.
-Set in a safe place and allow Wax will harden
-Trim Wick if needed
-Add Lavender Oil to the melted wax and stir
-Pour into metal tin
-Position wick in the center of the tin, resting on the bottom, use two popsicle sticks to hold wick in place.
-Set in a safe place and allow Wax will harden
-Trim Wick if needed
SILK SCARF PAINTING
-Fill a large bowl or a clean sink with warm water (enough to cover your scarf
-Empty White Alum powder into the warm water and stir until dissolved
-Soak silk scarf in the alum bath for 30 minutes
-Ring out scarf, Do not rinse, then Hang to air dry
-You may iron after dry, but this is not required. Iron with a cloth in between to avoid damaging silk. No steam setting.
-Lay out plastic on a flat surface
-Spray shaving cream in the shape of the scarf
-Use popsicle stick to spread evenly and create a smooth surface
-Using pipette, drop paint onto the surface of the shaving cream
-Using a popsicle stick, swirl your paint around (do not disturb too much, this can muddy up and fade your colors)
*You do not have to move the paint if you like your original pattern.
-Once you have reached your desired pattern, hold the scarf on all 4 corners (two people needed)
-Carefully place the scarf onto the paint surface. Push down gently to make sure all paint adheres.
-Allow to sit for 10 minutes
-Remove from surface and using the popsicle stick “squeegee” off the remaining foam.
-Rinse with cool water then Allow to air dry 24 hours
TO SET PAINT PERMANENTLY:
Iron Scarf with NO Steam and cloth in between to permanently set the paint
You can also place in the dryer on high for 5 minutes with a dry towel (NO STEAM!)
Once heat set, hand wash in cool water with mild detergent
Please share photos of you creating your scarf on Facebook or Instagram!!
DUTCH POUR
All paints are premixed with Flow Agent and some water. Mix paints before you pour. It is important to have similar consistencies, so if one of your paints seems too thick, add a small amount of water and stir. Silicone is optional. If you like the look of cells (bubbles), choose one color to add 5 drops of silicone in and mix the paint. Push pins into the back of the canvas to raise canvas off the table surface.
Here are some great Dutch Pour tutorial references. I recommend viewing multiple artists, to see which approach you like the best!
https://youtu.be/N3geH6nXIWc
https://youtu.be/3ChjVfVlIBw
https://youtu.be/J08izgagZVM
Here are some great Dutch Pour tutorial references. I recommend viewing multiple artists, to see which approach you like the best!
https://youtu.be/N3geH6nXIWc
https://youtu.be/3ChjVfVlIBw
https://youtu.be/J08izgagZVM
RESIN SERVING TRAY
Acrylic pour on canvas
Here are some example videos for Acrylic Pour (My tutorial video failed to upload, so I am working on making another). I encourage you to watch various Pour techniques, as there are many variations to try. I love Dutch and Bloom Pours. Keep in mind, all paints are premixed with water and pouring medium. If your paint seems too thick, just add a little bit of water. THe most important part is all of your paints are stirred and similar consistency. When performing a dirty pour, you do not need to fill the entire cup with paint and can perform multiple pours on one canvas. Insert push pins into the back of the canvas stretchers to keep your canvas off the surface. Have FUN and thank you!
Clean Pour
https://youtu.be/Zql7yE02V_8
Dirty Pour Example
https://youtu.be/cTzd86ym3Xg
Clean Pour
https://youtu.be/Zql7yE02V_8
Dirty Pour Example
https://youtu.be/cTzd86ym3Xg
Resin Pour on Canvas
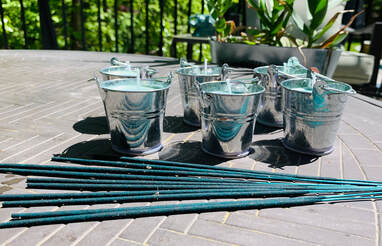
1. Fill a Pyrex or microwaveable container in the microwave with the soy wax in it.
(You may need to make two batches depending on the size of your container)
2. Microwave until melted (2-3 minutes depending on strength)
3. Add part of your citronella oil blend to the melted wax and stir. I find about 40 small drops works well. Remember you need to use the remaining oil for the incense sticks.
4. If you wish to color your candles, add Mica powder and stir.
5. Pour equal amounts of the wax into all of the buckets.
6. Place the wick in the center, using the popsicle sticks to hold the wick in place.
To make the incense:
Place all sticks flat in the bottom of the ziplock bag and drip the oil onto them. Shake and roll them to coat evenly. Allow to soak for 10 minutes. Remove and place in a glass, stick side down, to allow to dry overnight.
Incense burn for 30-45 minutes depending on the wind. I stick mine in planters then light.
|
|
|
SEASCAPE ART KIT
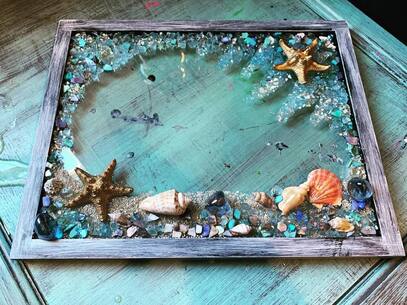
Use the clear glue to attach all of the provided materials any way you choose. A small dot is all that is needed. Wait a day for the glue to cure. Then pour the resin over it. Prop the glass part of the frame up on plastic cups and be sure to place plastic (I use garbage bags) underneath, in case the resin leaks through. Allow one day for resin to cure. To remove any bubbles you can blow lightly across the wet resin surface with a straw. Feel free to paint your frame any color you would like.
How to Mix Resin Example
(don’t worry about the saving of the cup, resin will take a day to cure. You may want to tape the back of your frame to prevent it from it leaking through after you pour the resin over. Make sure to prop up the frame on cups as it dried to avoid any leaks and binding to surface underneath frame)
https://youtu.be/YyhVp1Gc50o
Stained Glass Mosaic Frame
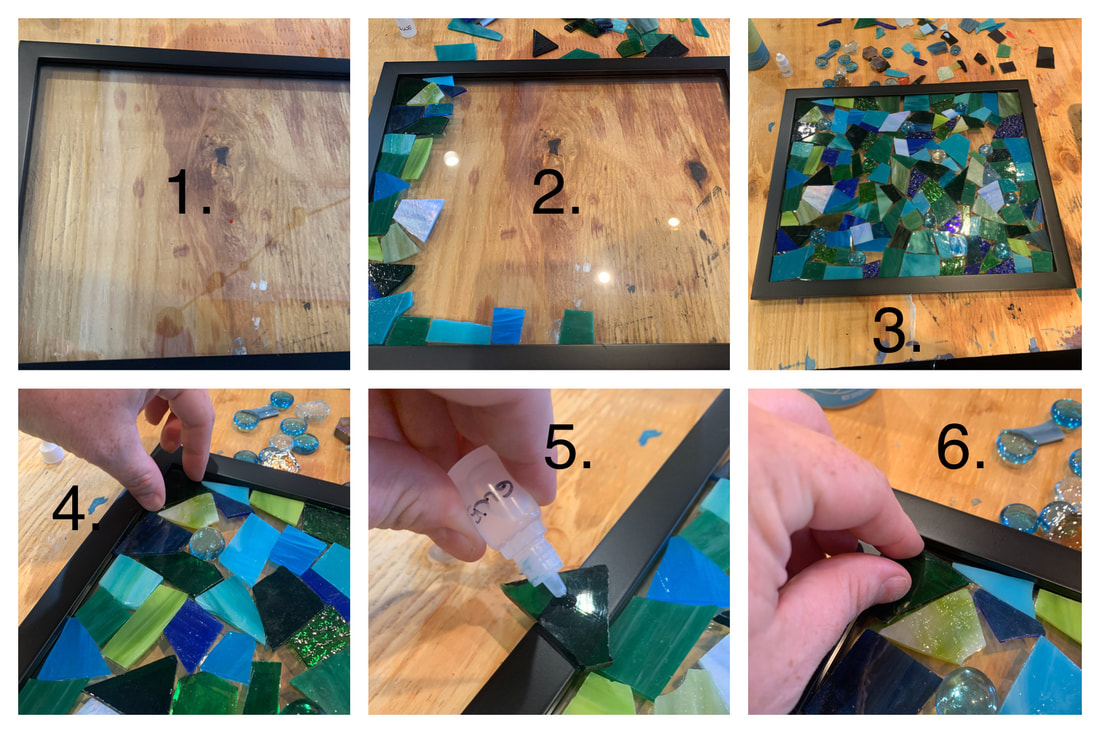
1. Remove all wrappers and stickers from frame and wipe clean with damp paper towel (no alcohol, as it can interfere with Resin Curing)
2. Begin on one side of the frame, start placing your glass. You can leave as much space in between your glass pieces as you prefer.
3. Fill the frame with all of the glass.
4. Begin to remove each piece individually
5. Apply a dot of glue on the back of each piece
6. Then return to its spot on the glass
(If you prefer not to glue each piece, that is okay. Glueing down the glass helps with the resin portion. If the glass isn't attached to the surface, it tends to move quite a bit)
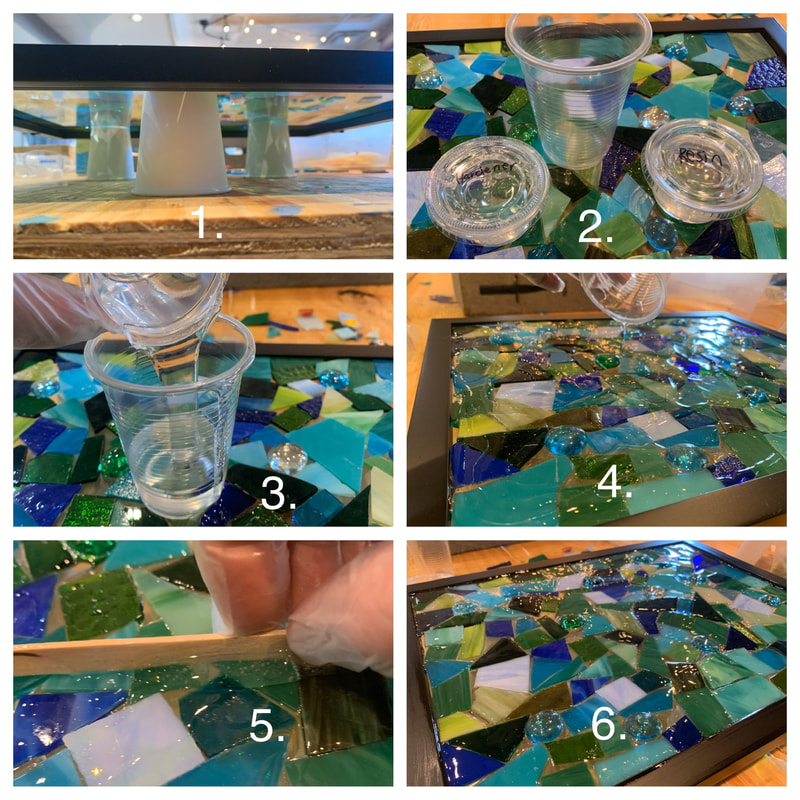
RESIN PORTION
1. Place cups underneath the frame, placing the glass directly on the cups. (Lay down a plastic garbage bag underneath, as the resin may drip through.
2. Have your plastic cup, Resin, Hardener, and Mixing Stick Ready
3.Pour the (R)esin and (H)ardener into the empty cup. Be sure to scrape all resin into the cup (It is very thick, so it can be tricky to pour out without some help of the stick). Stir the Resin and Hardener for 3 minutes, or until all striations have disappeared. Be sure to scrape the bottom and inside edges of the cup. Stir slowly, to avoid whipping the mixture.
(Please refer to the video under Geodes, if you would like an example)
4. Pour the prepared resin on top of the stained glass. Starting close to the frame edge then work your way in, creating a spiral.
5. Using the popsicle stick, pull the the resin across the surface. You can also use your fingers (with gloves) to move the resin across the surface, be careful not to rip your gloves.
6. Allow to dry overnight then place your beautiful piece in a sunny place!
Spring Kit Tutorials
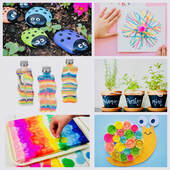
Lady Bug Rocks
I provided other paint colors in case you would like to paint a Bug another color. Use the paint brush provided in the Chalk Paint Craft to paint your rocks.
Use glue provided in the snail craft to attach the google eyes
https://www.easypeasyandfun.com/painted-ladybug-rocks/
Quilled Snail
(Print out the snail template on white paper or free hand the template provided in the tutorial link)
https://www.craftymorning.com/quilled-paper-snail-craft/
String Flower Art
https://www.hellowonderful.co/post/KID-MADE-DIY-STRING-ART-FLOWER-CARDS/
I recommend Doubling up the white paper to create a firmer template. Use the needle to poke holes through both sheets.
Chalk Paint Flower Pots
-Paint the pots with the black chalk paint
-Allow Paint to dry thoroughly
-write the plant name on each pot with provided chalk
-fill each pot with soil
-using your finger to make a few little holes, plant seeds 1/4 inch below the soil
-tie twine around the tops of the pots (not required)
-water the soil every few days to keep the soil moist. Do not over water. Place near a sunny window
Tissue Paper Canvas
Note, the spray bottle provided has alcohol in it. I find alcohol helps with the bleeding process. Soak the canvas with alcohol/water spray first to get it saturated. Work in sections to ensure the canvas is wet before placing the tissue paper on top. The wetter the canvas, the better the “bleeding”. You do not need to place in any particular order like the tutorial. Once all paper has been placed, spray again on top. Allow it to completely dry before removing the paper. Note, this is supposed to represent a watercolor, so the colors will be muted in relation to the actual paper color.
https://www.muminthemadhouse.com/bleeding-tissue-paper-canvas-art/
Sand Art
https://www.hometalk.com/43289636/mini-sand-art-bottle-decor?expand_all_questions=
Candle Making
What you’ll need:
Pyrex or Microwavable Measuring cup
Hot pad to remove Measuring Cup
Microwave
1.Using the candle tin you are making, scoop 1 1/2 (one full tin and one half tin) of wax flakes into a microwaveable cup. (Pyrex or similar recommended)
2. Microwave time will depend on the strength of you microwave. Microwave for 2 minutes, watching the wax melt, remove once all flakes have liquified.
3. Choose your scent. Feel free to experiment and combine scents! Amount of oil will be determined by your preference of scent intensity. I recommend using 15-20 drops total for the small tins, and 20-25 drops for the large tins. (I have included 40-45 drops in each glass container). Remove the top from the oil then using the pipette, drop oil into the melted wax. Mix the wax to disperse the oil.
4.To color your candle, slowly add and stir the Mica Powder Color of your liking. The amount you add is up to you. Feel free mix powders to experiment.
5. Next trim your candle wick to a length that extends 1/4 inch above the top lip of the tin from the bottom.
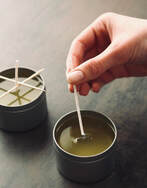
6. Pour your melted wax into the candle then place your wick in the center. To hold your wick in place, lay two sticks across the top of the tin, with your wick in between.
7. Your candle will harden in a few hours, depending on the temperature of your home. Placing in the refrigerator can speed up the hardening process. You may want to trim the wick if it is too long once the wax firms. Standard wick length is about 3/4 inch from wax surface.
8. Wipe out any remaining wax from your Pyrex with hot water and soap before maxing your next candle.
Easter Kit Tutorial References
For those of you that picked up kits today, I completely forgot to hand out shaving cream for the Marbled Paper Egg Craft. My sincere apologies! Please email me [email protected] and I am happy to reimburse you for the Foam. I use the brand from the Dollar Tree, however all types will work. If you would like to pickup next week, let me know. If you live near by the studio, I am happy to drop it by your home too.
(Please note provided links a for example purpose, Paint N Play RVA LLC does not claim the rights. Some video materials may vary slightly)
String Balloon Egg
Glue is premixed with water already
https://youtu.be/LjFTWlYr6EI
Pom Pom Chick
(We included a felt beak, in the tutorial they make feet out of cardboard)
https://youtu.be/9byxlG9_0fk
Pom Pom Bunny
https://youtu.be/FfDKKxQ8ANo
Shaving Cream Marbled Paper Egg
(For those of you that picked up kits today, I completely forgot to hand out shaving cream for the Marbled Paper Egg Craft. My sincere apologies! Please email me [email protected] and I am happy to reimburse you for the Foam. I use the brand from the Dollar Tree, however all types will work. If you would like to pickup next week, let me know. If you live near by the studio, I am happy to drop it by your home too.)
Popsicle stick is your “scrapper”. A baking sheet and foil works great or put a baking sheet inside a garbage bag, for easier clean up.
https://typicallysimple.com/marbled-paper-easter-eggs/
Plaster Egg
Paint with provided brush and paint
Wooden & Spring Foam Crafts
Paint and/or glue on embellishments
**Please note, some materials may vary from the example tutorials. Links are for example purpose only. Paint N Play RVA LLC does not claim rights to any links or videos provided that are not through our YouTube Channel**

